How to Connect Your Framer Forms to Brevo (Step-by-Step)
If you’ve designed a beautiful custom form in Framer and want the submissions to go directly to your Brevo email marketing lists, you can connect them using the Framer Forms Connect plugin.
Before starting, make sure you have your form completely designed in Framer and your Brevo account set up. There are two ways to connect them: using an API Key (recommended) or using HTML.
Method 1: The API Key Setup (Recommended)
This method connects your custom Framer form directly to Brevo in the background, keeping your design exactly how you built it.
1. Add the Framer Forms Connect Plugin
In your Framer project, open the Insert menu and navigate to Plugins. Search for Framer Forms Connect. Find Brevo in the list of supported platforms and drag the plugin block directly onto your Framer canvas. (It will appear as a functional block you can interact with).
2. Wire the Plugin to Your Form
Note: if your form is nested inside your webpage design, drag the form component outside of the main page canvas. Click on the Brevo plugin block you just added, grab the connection wire (the small dot on the edge of the block), and drag it to attach to your form.
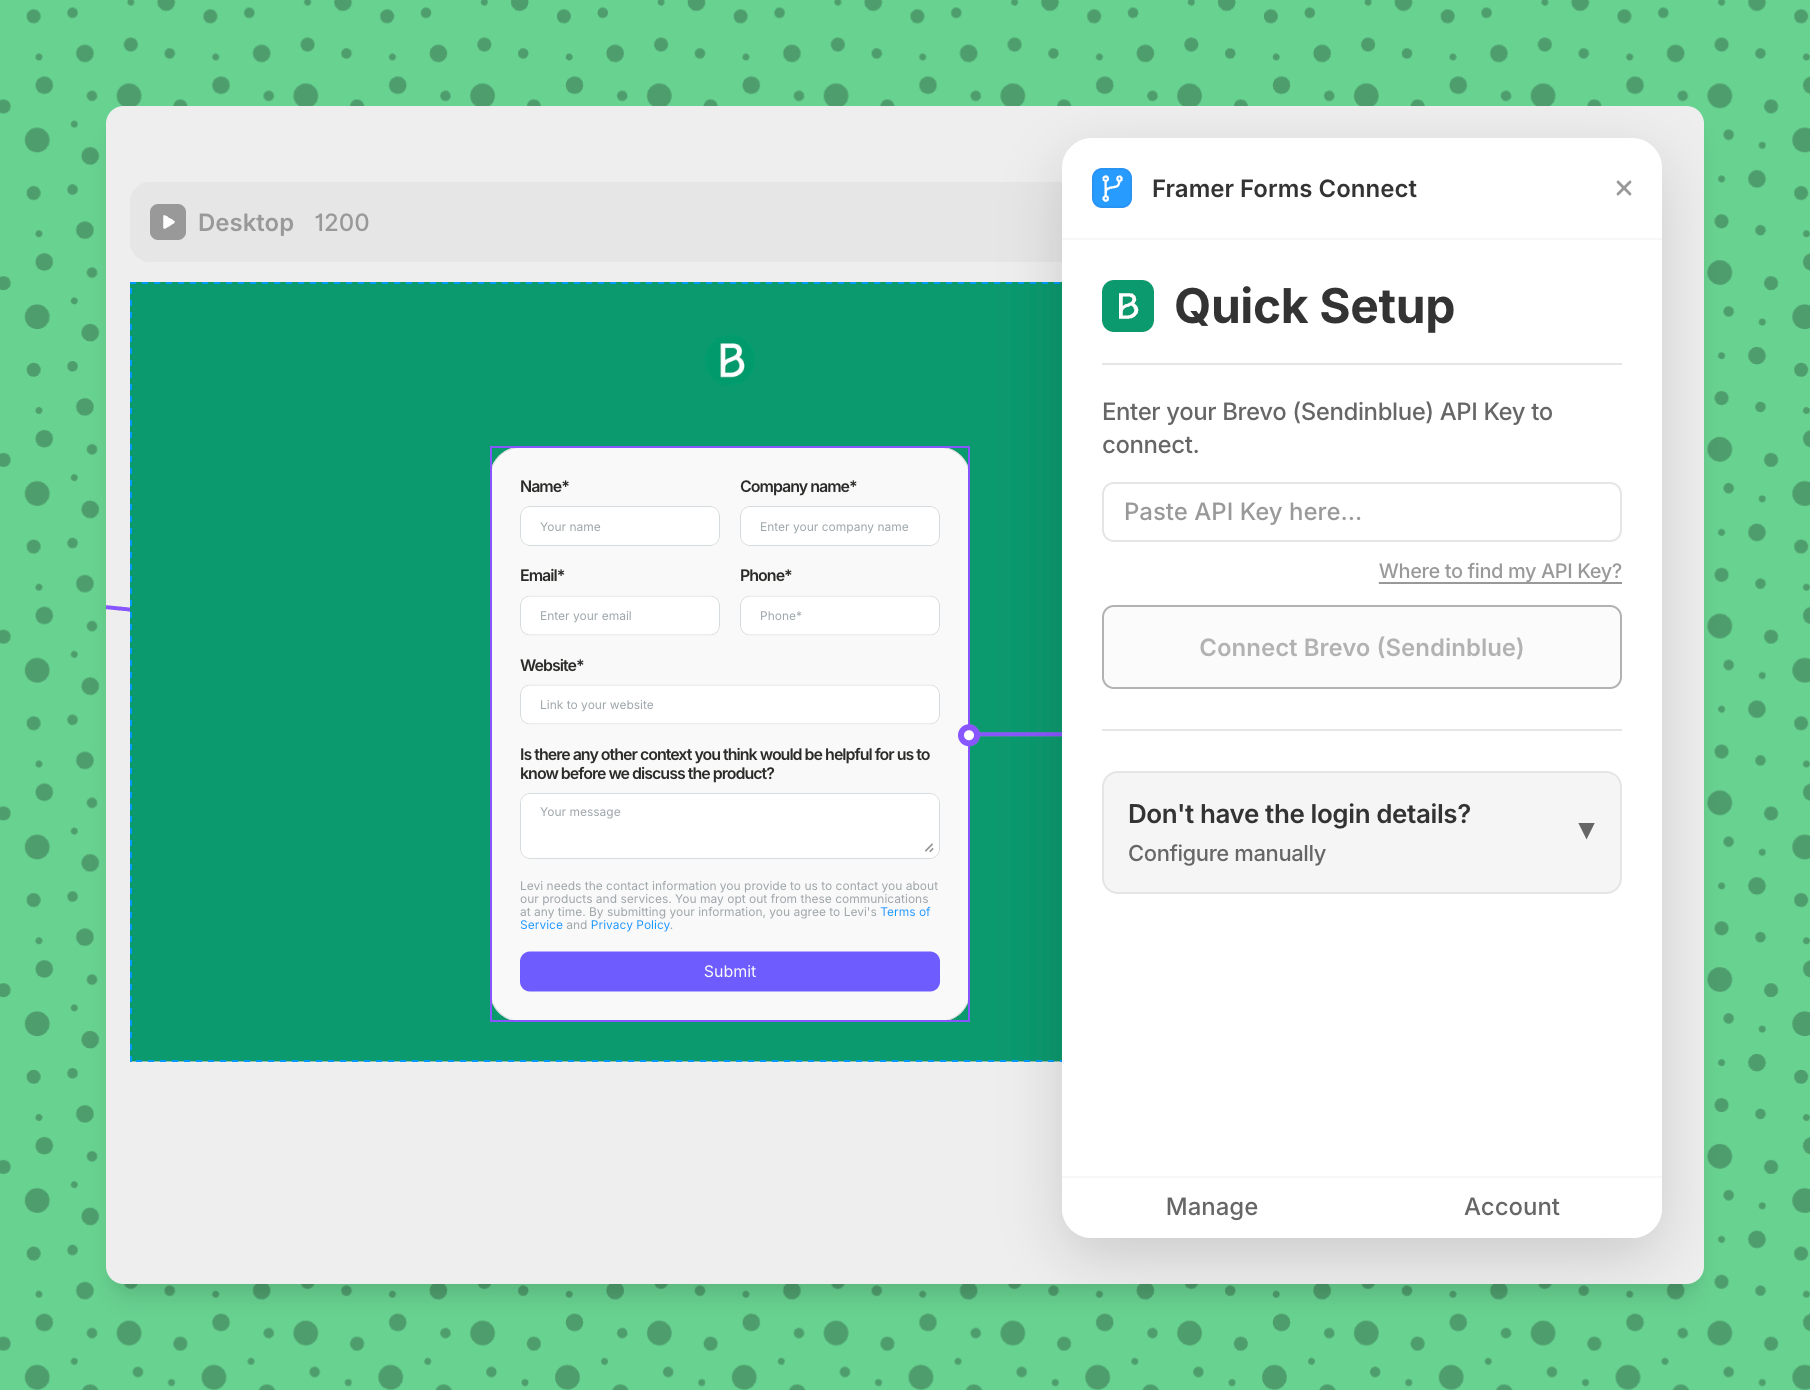
3. Enter Your Brevo API Key
Find this in your Brevo account settings.
Click on the plugin block. A settings panel will appear asking for your Brevo API key. Log into your Brevo account in a separate tab, go to your account menu (top right), and find your SMTP & API or API Keys section. Generate a new key, copy it, and paste it back into the Framer plugin. Select the specific Brevo email list you want this form to send subscribers to.
4. Match Your Field Names Exactly
This is the most common reason forms fail.
Brevo needs to know which input box corresponds to which piece of data. Look at the names of the fields in your Brevo account (for example, Brevo often capitalizes "EMAIL").
In Framer, click on your form's input field and find the Name property in the right-hand panel. Change this name to match Brevo exactly. Do this for every field, including names, phone numbers, or GDPR consent checkboxes.
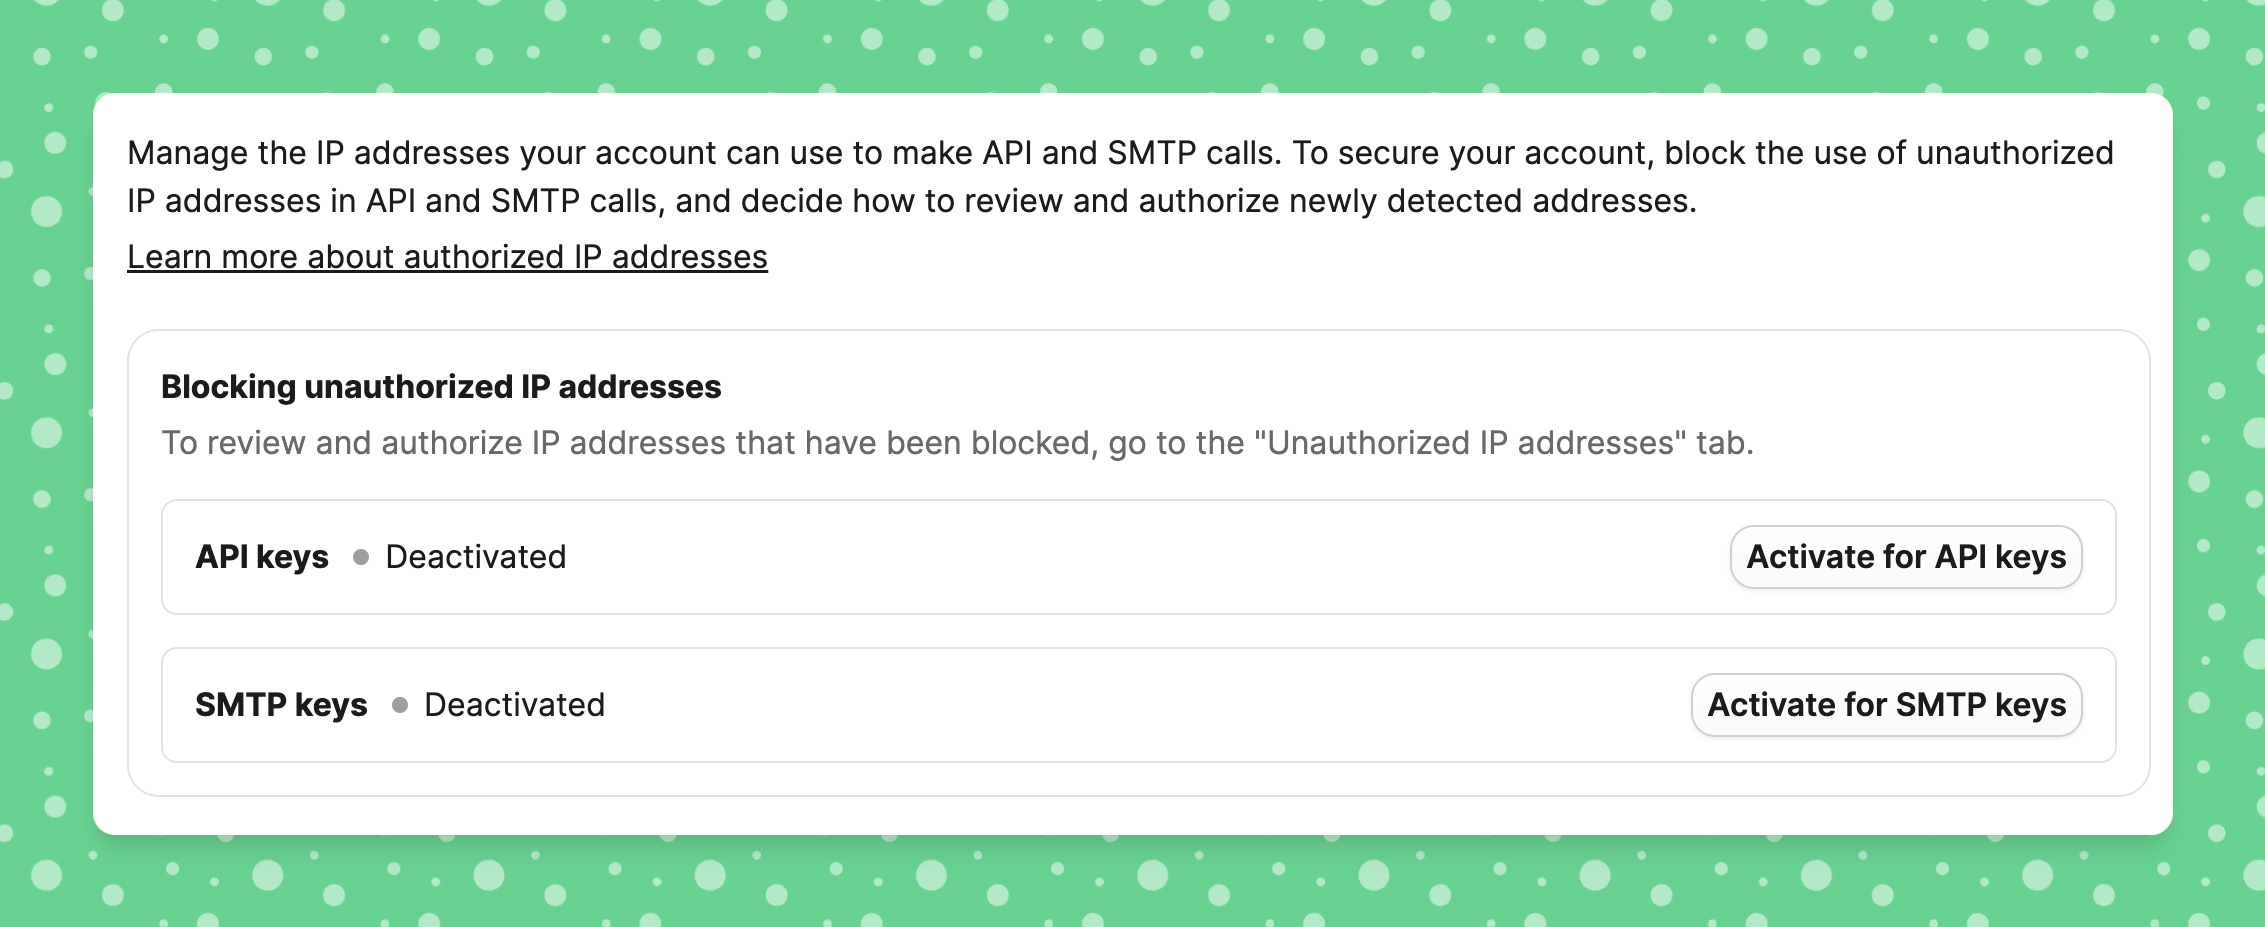
5. Authorize Framer in Brevo
Brevo blocks unauthorized apps by default.
To prevent security blocks, you need to tell Brevo that Framer is allowed to send data. Inside Brevo, navigate to Settings > Security.
Look for the API key authorization settings. You can either manually add Framer's IP addresses to the allowed list, or disable the IP authorization requirement for your API keys.
6. Publish and Test
Publish your Framer site and fill out your live form to test it. If successful, you'll see a success message. If it fails, the plugin will display a specific error. Once it works perfectly, go into the plugin settings in Framer and turn off "Show Errors" so your website visitors never see technical warnings.
Method 2: The HTML Embed Setup
If you don't have an API key, you can use this fallback method:
1. Build Your Form in Brevo
Log into Brevo, go to the Forms section, and create a new form. Add all the fields, checkboxes, and buttons you need using Brevo's form builder.
2. Copy the HTML Code
Once your form is complete, proceed to the "Share" step in Brevo. Look for the HTML sharing option and copy the entire block of code provided.
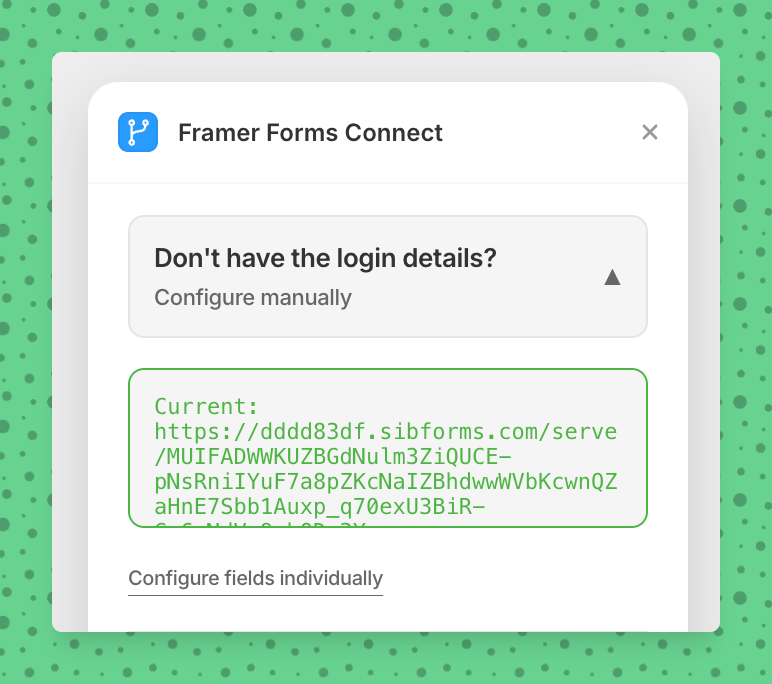
3. Configure the Plugin in Framer
Back in Framer, add the Framer Forms Connect plugin to your canvas. Select the option that says "Don't have login details? Configure manually".
4. Paste and Connect
Paste the HTML code you copied from Brevo into the provided box. Finally, drag the connection wire from the plugin block and attach it to your form layout on the canvas. The plugin will parse the HTML and connect the form for you.
Framer Forms Connect is the fastest, most secure way to connect Framer to popular CRMs and newsletters.
🚀 Start collecting submissions today with zero technical headaches.
Trusted by hundreds
Framer Forms Connect is among the fastest growing plugins on the Marketplace