How to Connect Your Framer Forms to HubSpot (Step-by-Step)
For B2B startups and SaaS companies, HubSpot is the central nervous system for sales and marketing. But if you’re designing a landing page in Framer, you’ve probably hit a wall: the official HubSpot plugin only lets you drop in a rigid, un-customizable form block that clashes with your design.
If you want to keep your custom Framer form styling while routing lead data into your HubSpot CRM, the Framer Forms Connect plugin is the solution. In this guide, we’ll walk through how to bridge that gap in just a few minutes.
Before starting, ensure you have your form designed in Framer and a destination form created in your HubSpot account. There are two ways to connect them: signing in directly (the fastest way) or using an embed code (perfect if you don't have direct HubSpot login access).
Method 1: The Quick Setup (Direct Login)
This method allows you to authorize the connection securely with just a few clicks, keeping your custom design completely intact.
1. Add the Framer Forms Connect Plugin
In your Framer project, search for the Framer Forms Connect plugin. Select HubSpot from the integrations list and drag the plugin block directly onto your Framer canvas.
2. Wire the Plugin to Your Form
Note: if your form is nested inside your webpage design, drag the form component outside of the main page canvas.
Click on the HubSpot plugin wrapper you just added, grab the connection wire, and drag it to attach to your form.
3. Connect Your HubSpot Account
Securely sign in with one click.
Click on the plugin block. In the settings panel, click the "Sign in to HubSpot" button. A secure window will pop up asking you to choose your HubSpot account and grant access. Click "Allow" to authorize the connection.
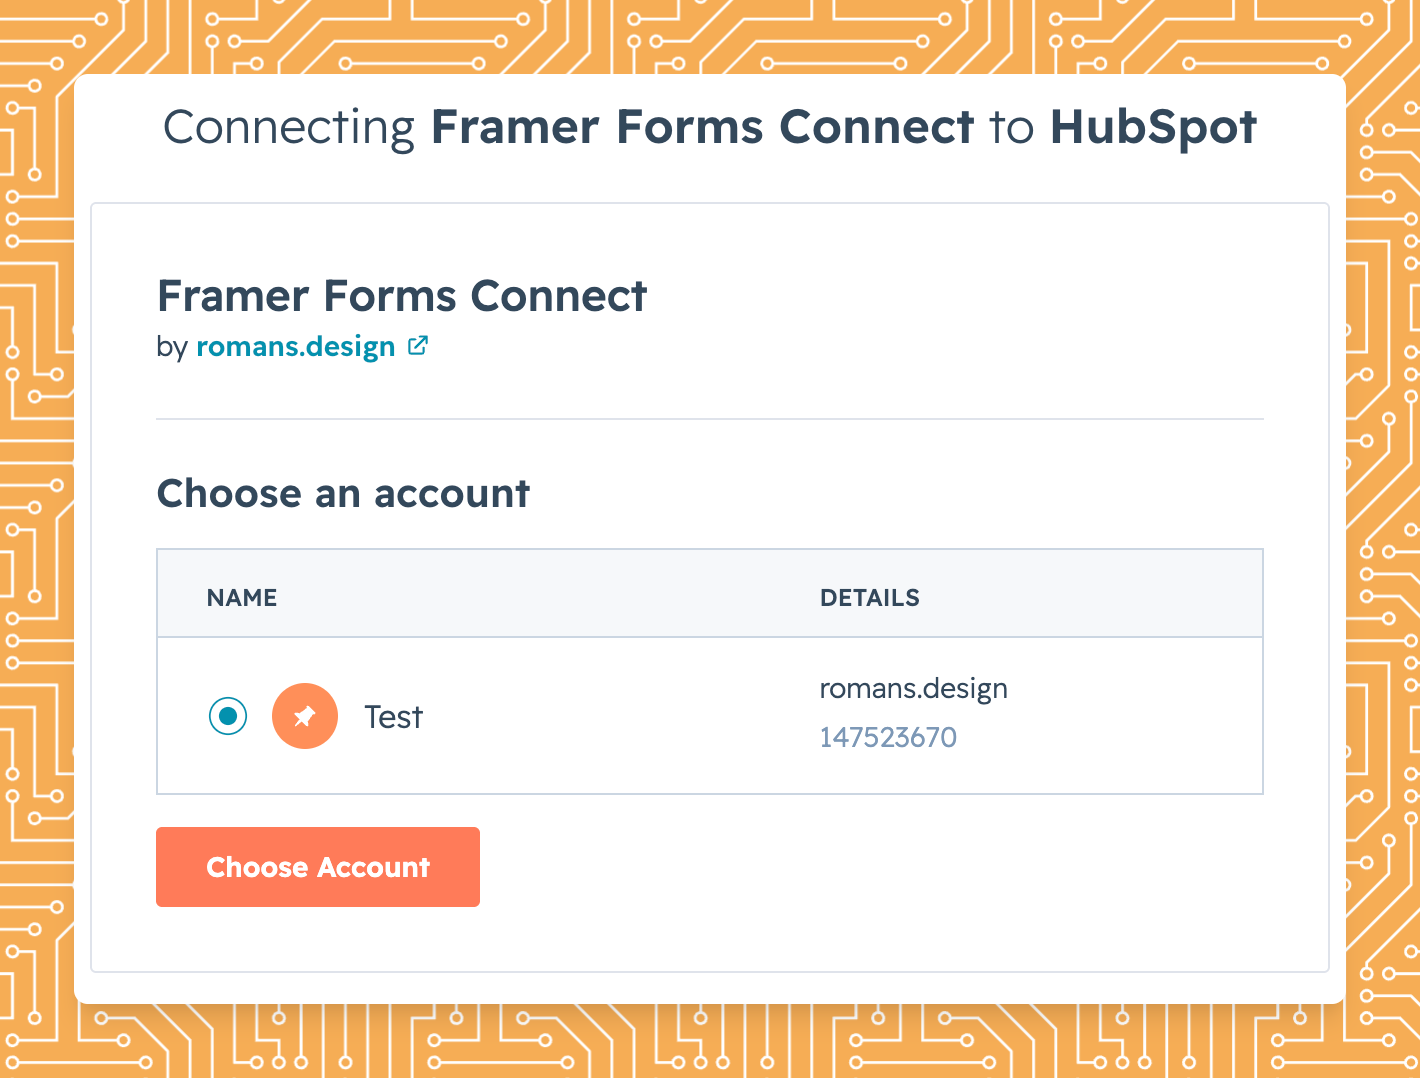
4. Select Your Destination Form
Choose where your lead data should go.
Once connected, the plugin will automatically fetch the forms from your CRM. Simply select the specific HubSpot form you want to route your Framer submissions to from the dropdown menu.
5. Match Your Field Names Exactly
This ensures your data maps correctly into HubSpot.
HubSpot needs to know which input box corresponds to which CRM property. The plugin will display the exact field names HubSpot expects (for example, "firstname" or "email" in all lowercase). In Framer, click on your form's input fields, find the Name property in the right-hand panel, and change it to match the HubSpot name exactly. Do this for every field.
6. Publish and Test
Publish your Framer site and fill out your live form to test it. If successful, you'll see a success message. If a required field is missing or named incorrectly, the plugin will display a specific error so you can easily fix it. Once it works perfectly, go into the plugin settings in Framer and turn off "Show Errors" so your website visitors never see technical warnings.
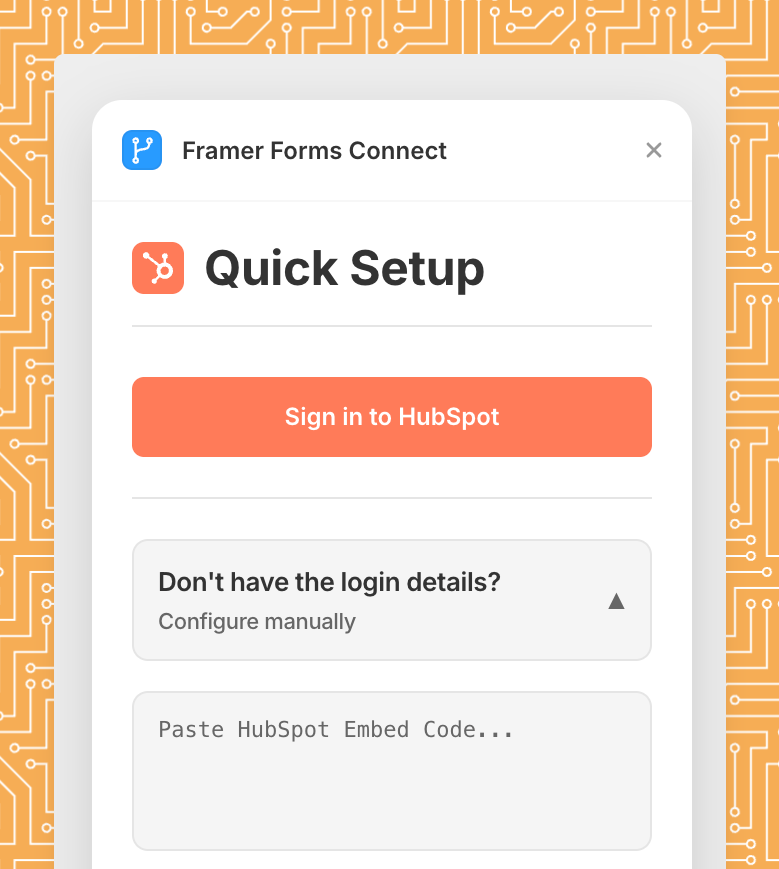
Method 2: The Manual Embed Setup
If you are building a site for a client and don't have direct login access to their HubSpot portal, you can bypass the login entirely using this fallback method.
1. Get the HubSpot Embed Code
Ask your client or grab it from the portal.
Go to the forms section in HubSpot (or have your client do this), open the specific form, click the "Share" button, and copy the Embed code.
2. Configure the Plugin in Framer
Back in Framer, add the Framer Forms Connect plugin to your canvas. Instead of clicking the sign-in button, select the option that says "Don't have the login details? Configure manually".
3. Paste and Connect
Paste the HubSpot embed code you copied into the provided box. Finally, drag the connection wire from the plugin block and attach it to your form layout on the canvas. The plugin will handle the rest behind the scenes.
Framer Forms Connect is the fastest, most secure way to connect Framer to popular CRMs and newsletters.
🚀 Start collecting submissions today with zero technical headaches.
Trusted by hundreds
Framer Forms Connect is among the fastest growing plugins on the Marketplace